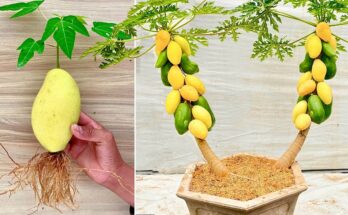
How To Graft A Mango Tree On A Guava Tree
Grafting is one of the most fascinating gardening skills because it allows growers to experiment creatively with plant combinations. While mango and guava trees are from different botanical families, many gardeners enjoy trying unique grafting ideas to improve their skills and learn more about plant behavior. Although a successful long-term union between mango and guava is unlikely in real-world horticulture, the process of practicing grafting techniques using these two plants can help you understand how to perform precise cuts, prepare scions, and care for healing grafts. This guide will show you how to perform the technique step by step, how to maintain the graft, and what benefits you can gain from the training process.
1. Understanding the Concept
Mango trees (Mangifera indica) belong to the Anacardiaceae family, while guava trees (Psidium guajava) are from the Myrtaceae family. In nature, grafts usually succeed when the rootstock and scion come from similar species or botanical families. Even though mango and guava are unrelated, the practice of grafting them together can still serve as an excellent way to sharpen your grafting skills, develop precision, and learn how different plant tissues respond to grafting methods.
Practicing these combinations also inspires creativity and helps gardeners experiment with hybrid gardening ideas. You can still benefit from improved rootstock management, scion handling, sterilization habits, and aftercare techniques.
2. Tools and Materials Needed
To graft a mango tree onto a guava tree correctly, prepare the proper tools:
- A healthy guava seedling or young guava tree (rootstock)
- A fresh mango scion (one-year-old branch with healthy buds)
- Sharp grafting knife or clean pruning shears
- Grafting tape or plastic wrap
- Alcohol or flame for sterilizing tools
- Natural sealant such as tree wax or grafting paste
- Clean cloth or tissue
Having sharp and sterilized tools is extremely important because clean cuts heal faster and reduce the risk of infection.
3. Selecting the Right Rootstock and Scion
Choosing the Rootstock (Guava Tree)
Select a guava plant that is young, vigorous, and about the thickness of your thumb. Younger rootstock tissues heal faster and blend more easily with the scion.
Choosing the Scion (Mango Branch)
Pick a healthy mango branch with 2–3 buds. The ideal scion should be semi-hardwood—neither too soft nor too mature. Choose scions early in the morning when moisture content is high.
4. Step-by-Step Grafting Method
Step 1: Sterilize Your Tools
Before making any cuts, sterilize your knife or shears. Clean tools protect the graft from disease and fungal infections.
Step 2: Prepare the Guava Rootstock
Identify a straight, smooth section of the guava tree. Perform a cleft graft, which works well with branches of similar thickness.
- Cut the guava’s selected stem horizontally.
- Create a 2–3 cm deep vertical split in the center of the cut.
- Make the split smooth and even using your knife.
Step 3: Prepare the Mango Scion
Shape the base of the mango scion into a wedge. This wedge should be clean, smooth, and about 2–3 cm long, matching the depth of the guava split.
Step 4: Insert the Scion into the Rootstock
Carefully open the guava split and insert the mango scion. Ensure the cambium layers (green tissue just beneath the bark) of both plants touch at least on one side. Proper cambium alignment is the key to graft success.
Step 5: Wrap and Seal the Graft
Use grafting tape or plastic wrap to secure the graft tightly. Make sure no air enters the wound. Apply tree wax or sealant to protect the graft from moisture loss and pests.
5. Aftercare for the Grafted Plant
Aftercare determines the success or failure of your grafting experiment.
Provide Shade
Place the grafted plant in partial shade for 7–14 days. This prevents the scion from drying out before it attaches to the rootstock.
Water Carefully
Keep the soil slightly moist but never waterlogged. Too much water can stress the plant or cause root rot.
Monitor New Growth
After 3–5 weeks, if the scion remains green and firm, it indicates that the graft is healing. If buds begin to swell, this is a positive sign.
Remove Unwanted Shoots
Cut off any new shoots growing from below the graft on the guava rootstock. This redirects all energy toward healing the graft.
Gradually Increase Sunlight
Once the graft shows signs of success, slowly increase its sunlight exposure. Sudden full sun may dry out the tender scion.
6. Benefits of Practicing This Graft
Even though mango and guava are not naturally compatible, practicing this technique gives you several gardening advantages:
- Improved skill level with grafting knives and precision cuts
- Knowledge of cambium alignment and graft healing
- Understanding rootstock behavior
- Enhanced creativity for hybrid gardening projects
- Inspiration to try compatible grafts in the future, such as guava-to-guava or mango-to-mango
This process helps gardeners build confidence before working with real compatible species.
7. Tips for Better Success
- Use fresh scions—never dry or wilted ones.
- Avoid grafting during extreme heat or heavy rain.
- Keep the graft union clean and tightly sealed.
- Check for pests such as ants or mites around the graft point.
- Practice cuts on spare branches before doing the actual graft.
Conclusion
Grafting a mango tree onto a guava tree is a creative gardening experiment that helps you build strong grafting skills. While these two species cannot grow together naturally for long-term fruit production, the technique teaches you precision, patience, and plant-handling expertise. By following the steps above—selecting healthy materials, performing accurate cuts, sealing the graft, and giving proper aftercare—you can successfully complete the process and improve your overall horticultural knowledge.